How to Install a Drop Ceiling
Drop ceiling installation is a popular home improvement project. It offers a practical way to hide infrastructure and create a modern look. With the right tools and approach, homeowners can successfully install a drop ceiling.
The process is straightforward and less messy than traditional drywall installation. A standard basement family room can be transformed in about 1.5 days. This makes it an attractive option for DIY enthusiasts.
Drop ceilings offer more than just visual appeal. They hide electrical wiring, plumbing, and ductwork while allowing easy access for maintenance. The project has a moderate difficulty level of 7 out of 12.
重要なポイント
- Drop ceiling installation is a manageable DIY project
- Provides easy access to hidden infrastructure
- Offers a clean, modern aesthetic for various rooms
- Can be completed in a relatively short time frame
- Requires minimal specialized tools and skills
Essential Tools and Materials for Drop Ceiling Installation
Planning is key for a successful drop ceiling installation. The right equipment ensures a smooth process. Understanding the necessary tools and materials is vital for your project1.
Gather these essential tools for your cost-effective drop ceiling project:
- Ladder
- 万能ナイフ
- Screwdriver or drill
- 巻尺
- 安全ゴーグル
- Work gloves
必要な材料
Specific materials are crucial for a professional finish. Your project will require these items2:
- Suspension grid system
- Ceiling tiles (various options available)
- Hanger wire
- Wall molding
Consider different material options for ceiling tiles. Mineral fiber tiles absorb sound well. PVC tiles work great in humid spaces2.
Tile prices vary from $1 to $70 per square foot. The cost depends on the material and design2.
Pro Tip: Let ceiling panels adjust to room temperature for 24 hours before installing1.
Keep the room temperature between 60°F and 80°F during installation. Ensure relative humidity stays below 70%. Plan for a minimum 4-inch drop from the existing ceiling1.
Average installation costs range from $9 to $13 per square foot. This includes materials and labor2. With proper planning, you can create a stunning drop ceiling.
Preparation and Planning Your Drop Ceiling Project
成功 suspended ceiling installation starts with careful planning and precise measurements. Take time to assess your space thoroughly before beginning your ceiling grid installation. Drop ceilings can save homeowners up to 50% on material costs compared to traditional ceiling treatments.
To ensure a smooth installation, follow these key preparation steps:
- Measure the room dimensions accurately
- Check ceiling height and potential obstacles
- Plan for lighting and ventilation fixtures
- Calculate the number of ceiling tiles needed
Critical measurement considerations include:
| Measurement Aspect | Recommended Specification |
|---|---|
| Ceiling Tile Size | 24″ x 24″ or 24″ x 48″3 |
| Minimum Ceiling Drop | 4 inches from existing ceiling3 |
| Main Beam Spacing | 4 feet on center3 |
プロのヒント: Remove ceiling panels from cartons 24 hours before installation. This allows them to acclimate to the room, preventing potential warping or sizing issues.
Safety should always be a top priority during preparation. Wear safety glasses and gloves to protect yourself from sharp metal components. Proper planning ensures a smooth ceiling grid installation, resulting in a professional and polished finish.
How to Install a Drop Ceiling
Drop ceilings offer a sleek solution for hiding utilities and creating a polished look. With proper planning, homeowners can tackle this project successfully. Suspended ceiling installation demands precision and careful preparation.
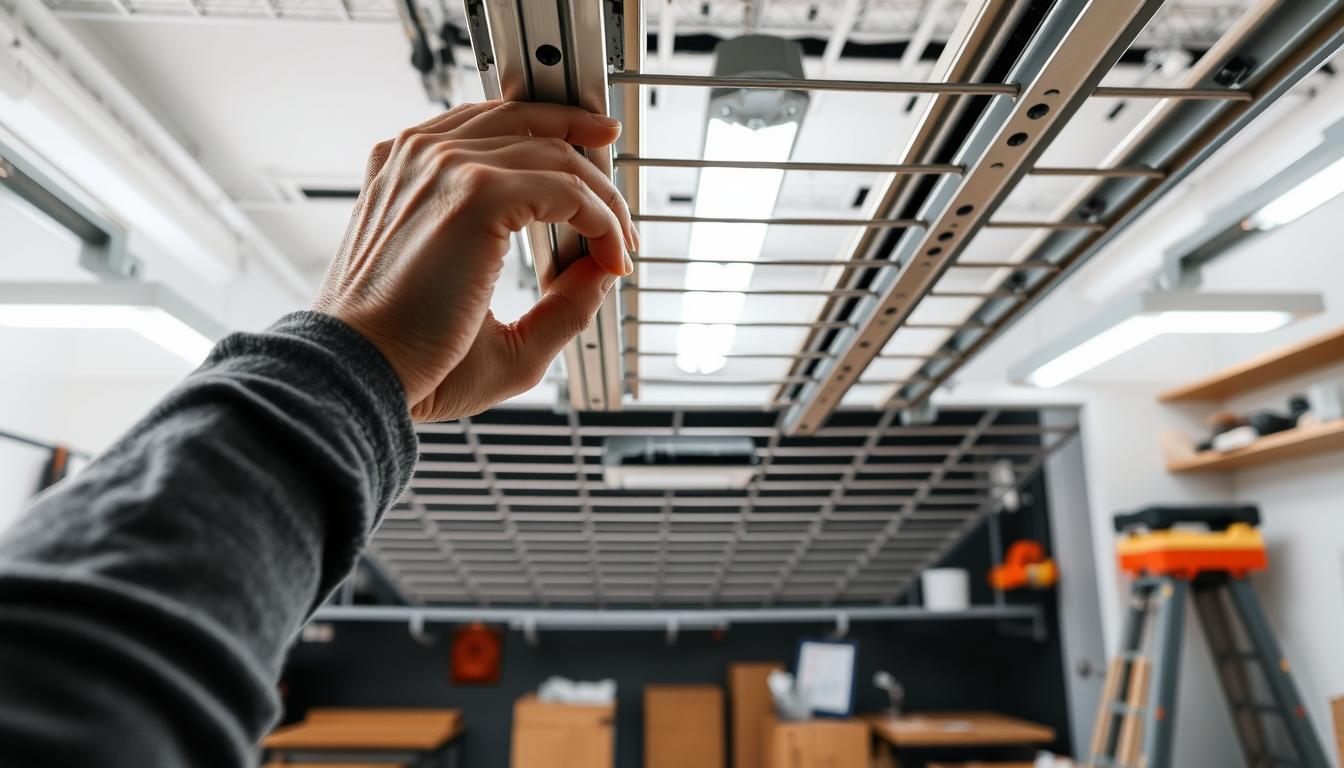
Start by marking the wall molding accurately. Use a chalk line to create level guidelines around the room. Secure the wall angle with 1-1/4-inch drywall nails at every stud4.
The metal wall angle, typically 3/4 to 7/8 inch high, provides a solid base. This is crucial for your drop ceiling installation5.
Assemble the grid system with care. Place hanger eye hooks no more than 4 feet apart along the main T chalk line5. Check diagonal measurements after finishing each section to ensure squareness4.
A grid punch can speed up the process of creating rivet holes. This tool is much faster than traditional drilling methods4.
Keep a minimum height clearance of 4 inches from the lowest obstacle. Ideally, aim for a 6-inch clearance5. Consider your space’s specific needs when choosing drop ceiling panels.
Most installations can be completed in about one day. This makes it a doable weekend project for DIY fans4.
よくある質問
What is a drop ceiling and why should I consider installing one?
How much does it typically cost to install a drop ceiling?
What tools do I need to install a drop ceiling?
How long does a drop ceiling installation typically take?
Can I install a drop ceiling myself, or do I need professional help?
What types of ceiling tiles are available?
How do I handle cutting tiles around light fixtures or vents?
How much ceiling height do I lose with a drop ceiling?
Are drop ceilings energy efficient?
How do I maintain and clean my new drop ceiling?
ソースリンク
- Drop Ceiling Installation | Ceilings | Armstrong Residential – https://www.armstrongceilings.com/residential/en-us/project-ideas-and-installation/drop-ceiling-installation.html
- How To Install a Drop Ceiling – https://www.thisoldhouse.com/ceilings/21151477/read-this-before-installing-a-drop-ceiling
- How To Install Drop Ceilings | Easy Install Guide – https://kanopibyarmstrong.com/pages/how-to-install-drop-ceilings
- 12 Drop Ceiling Installation Tips from a Pro – https://www.familyhandyman.com/list/drop-ceiling-installation/?srsltid=AfmBOopd7TxWYHxJwvMSOZFrztyTqW8t6ZtaATRDH0mIYxJaoWHIrEpV
- How To Install A Suspended Ceiling – https://www.house-improvements.com/how-to-install-a-suspended-ceiling


最新のビデオ

受信トレイ経由のニュース
ヌラ・タープ・ディス・クルスス。整数リベロス euismod pretium faucibua