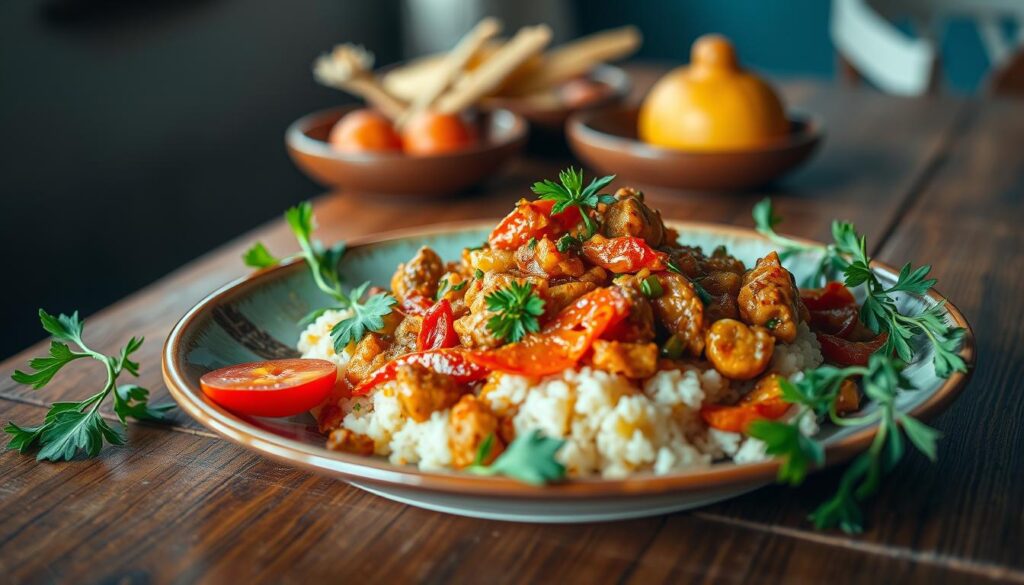
Cuisine photography turns simple dishes into visual stories. It captures the soul of local food through your lens1. Great food photos need careful planning and skill2.
Food styling goes beyond aiming a camera at a plate. It showcases textures, colors, and cultural essence. Your images should convey the warmth and passion behind each dish3.
Approach your subject creatively and precisely. Choose the right angles and understand lighting. Prepare your equipment thoroughly1.
Key Takeaways
- Understand the cultural context of each cuisine
- Learn advanced food styling techniques
- Master lighting and composition skills
- Invest in quality photography equipment
- Practice storytelling through visual presentation
Understanding the Essence of Cuisine Photography
Cuisine photography is an art form that turns food into visual stories. It captures the soul of dishes through strategic plating and thoughtful composition. This art goes beyond simple food documentation4.
David Loftus has transformed dining photography by treating food as a narrative medium. His approach shows how angles and lighting can enhance culinary images. Careful selection of these elements can dramatically improve food pictures4.
The Importance of Context in Your Shots
Context breathes life into food photography. When capturing a dish, consider including:
- Surrounding ingredients
- Cooking utensils
- Cultural elements
- Preparation environment
Capturing Culture Through Food
Food is a universal language that speaks about cultural identity. Your food photography lighting should highlight the dish’s historical and emotional significance. It’s not just about the food, but the story behind it5.
“Photography is about capturing the essence of a moment, and with food, that moment is deliciously complex.”
Selecting the Right Angles and Perspectives
The perfect angle can turn an ordinary meal into a compelling visual story. Consider these perspective strategies:
- Overhead shots for ingredient showcase
- Low-angle views to highlight dish layers
- Close-ups that reveal texture and detail
Professional food photographers blend technical skills with creative vision. They create images that document food and evoke emotion. Their work connects viewers to the cultural significance of each dish5.
Preparing for Your Food Photography Session
Successful restaurant photography hinges on careful planning. Your groundwork sets the stage for capturing mouthwatering images that tell a story.
Preparation is key to creating stunning food photos. A detailed shot list guides your culinary visual journey. It helps you capture all the necessary angles and compositions6.
Choosing the Right Location
The right location can elevate your food photography. Look for spaces with plenty of natural light, ideally near large windows.
Different photo needs require unique settings7:
- Horizontal shots for menus
- Vertical images for restaurant advertising
- Square compositions for social media
- Lifestyle images for magazine spreads
Gathering Necessary Equipment
Your photography toolkit should include versatile gear for top-notch results6:
| Equipment | Purpose |
|---|---|
| Camera | Primary image capture |
| Tripod | Stability and consistent framing |
| Light modifiers | Diffusers and reflectors |
| Backup batteries | Uninterrupted shooting |
Styling Your Cuisine for Impact
Styling turns ordinary dishes into visual stories. Choose props that enhance without overpowering the food.
Neutral tableware and backgrounds let your culinary subject shine7. They create a clean canvas for your food to take center stage.
The art of food photography lies in telling a story through each carefully crafted image.
Pro tip: Create a mood board to visualize your concept. This helps align your vision with client expectations6.
Thorough prep work smooths out potential bumps. It paves the way for a successful, stress-free photo shoot.
Techniques to Enhance Your Cuisine Photography
Great food photos tell compelling visual stories. They create an immersive experience that captures viewers’ attention. Mastering composition, lighting, and styling is key to crafting resonant images.
Natural light is your best friend in food photography. It provides soft illumination that highlights textures and colors. Even a smartphone can capture stunning images when used strategically.
The Rule of Thirds creates visually balanced compositions. It guides viewers’ eyes to the focal points you want to emphasize.
Post-processing adds another dimension to food photography. Subtle adjustments can improve images without sacrificing authenticity. Experiment with color temperature, saturation, and sharpness.
Props and styling techniques add depth to your photos. Use garnishes, cutlery, or strategic backdrops to enrich your visual story. Each photo should convey the dish’s essence and cultural context8.
FAQ
What equipment do I need to start food photography?
A smartphone or basic camera is enough to begin. A tripod helps with stability. Natural light, preferably near a window, is essential.
Diffusers and reflectors can improve your shots. White cards bounce light, while black cards create contrast.
How important is lighting in food photography?
Natural light is key in food photography. Use a diffuser to soften harsh sunlight. White cards brighten shadows, while black cards add contrast.
Good lighting highlights food’s texture and colors. It helps avoid harsh shadows that can ruin your shot.
What are some styling tips for making food look appealing?
Use neutral-toned tableware and backgrounds to make food pop. Try unexpected surfaces like slate or wooden cutting boards. Plate in odd numbers for visual interest.
Garnish with contrasting colors to add appeal. A thin brush of oil can make dishes look more appetizing.
Which angles work best for food photography?
Overhead shots show ingredients and shapes well. Low-angle shots highlight dish height and layers. Avoid random angles, especially with smartphone cameras.
Straight-on or overhead shots usually work best. Consider the food’s unique qualities when choosing your angle.
How can I tell a story through my food photographs?
Add context with related props like ingredients or cooking tools. Use composition techniques to guide viewers’ eyes. Think about the dish’s cultural or personal story.
The rule of thirds and leading lines can improve your shots. These techniques help create more engaging food photos.
What post-processing tips can improve my food photos?
Avoid heavy filters. Make subtle adjustments to saturation and sharpness. Simplify your color palette to make the food stand out.
Enhance the photo’s storytelling without over-processing. The goal is to keep the image looking natural and appetizing.
What type of cookware should I use for food photography?
White cookware provides a clean backdrop. Choose neutral-toned dishes that complement the food. The focus should always be on the dish itself.
Props and backgrounds should enhance the food’s visual appeal. They shouldn’t overshadow the main subject of your photo.
Source Links
- Restaurant Photography Tips From A Food Photographer | Regan Baroni – https://reganbaroni.com/blog/business/restaurant-photography-tips/
- The Serious Eats Guide to Food Photography – https://www.seriouseats.com/beginners-guide-to-food-photography
- How To Take Magazine Worthy Food Photography At Home | Click Love Grow – https://clicklovegrow.com/food-photography-guide/
- David Loftus: Capturing the Essence of Food Through Photography — about photography – https://aboutphotography.blog/photographer/david-loftus
- The Essence of Food Photography in Branding – https://www.linkedin.com/pulse/essence-food-photography-branding-seth-silver-feq4c
- Preparing For A Food Photoshoot + Free Shot List Template — Suzan Najjar Photography – https://suzannajjarphotography.com/blog/2021/1/29/preparing-for-a-food-photoshoot-free-shot-list-template
- How to prepare for your food photo shoot – https://candyfoxstudio.com/blog/how-to-prepare-for-your-food-photo-shoot
- 30+ food styling tips to elevate your food photography – french.ly – https://french.ly/30-food-styling-tips/